

Checkout Sessions
Learn how checkout sessions create payment requests.
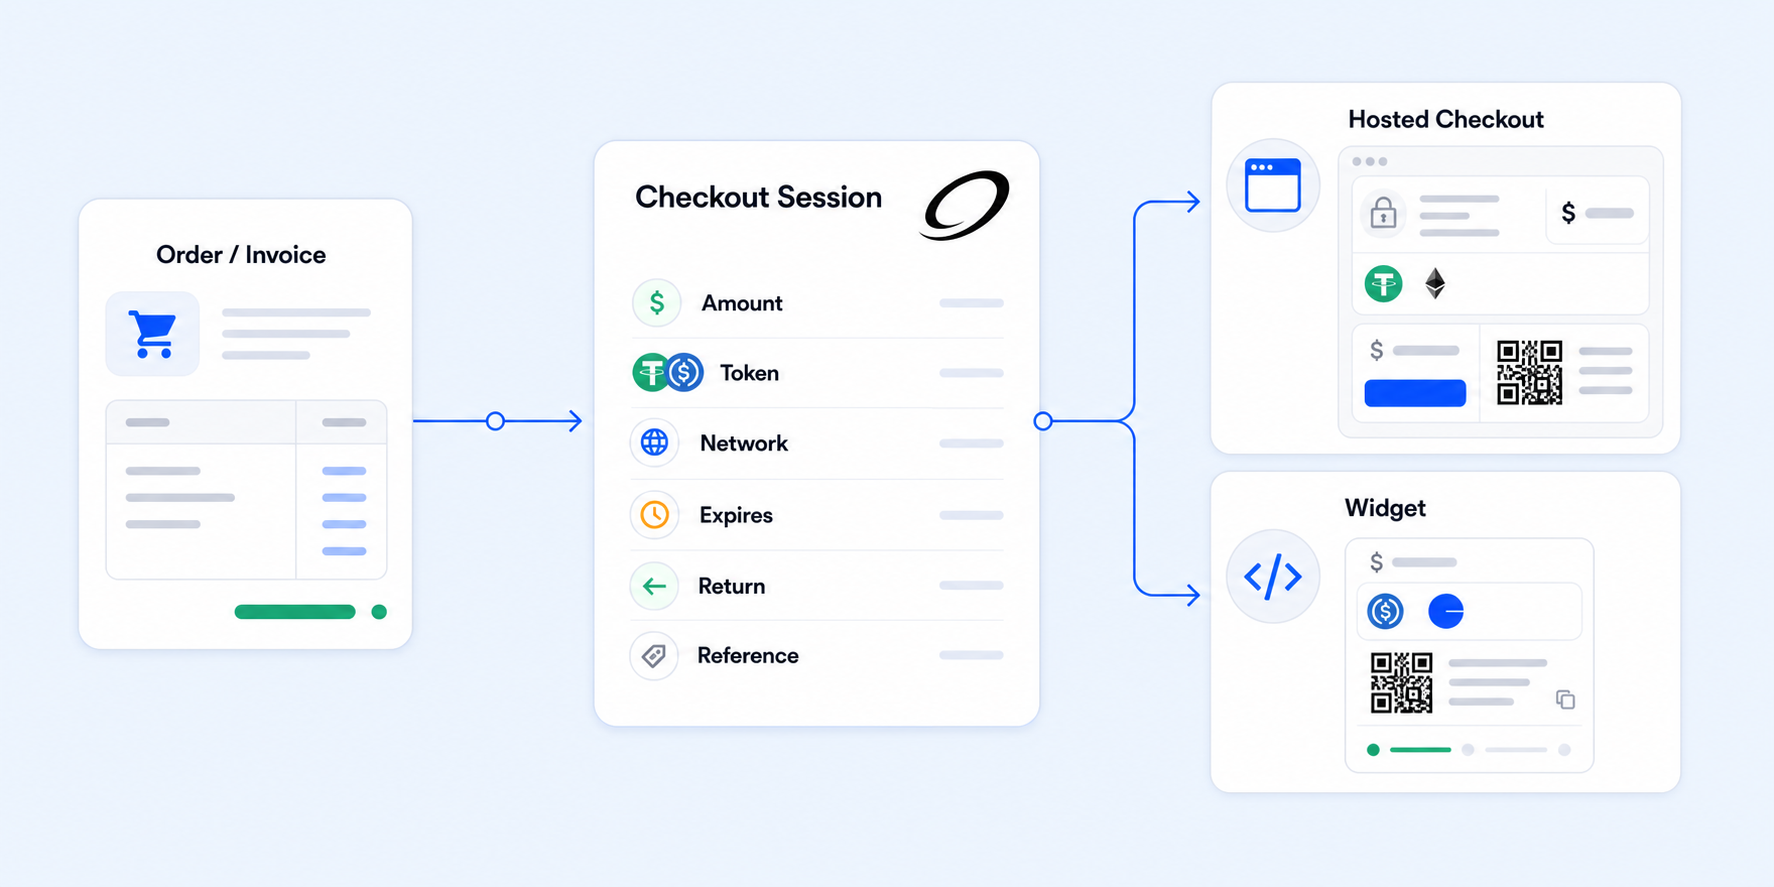
A checkout session is the payment request for one merchant order, invoice, or internal reference. It defines the amount, token, network, checkout display, and return path for that payment. Each checkout session maps to one payment request in the merchant system.
Before Creating A Checkout Session
Before creating a checkout session, set the payment details for the request:
| Information | Requirement | What it means |
|---|---|---|
| Payment amount | Required | The USDT or USDC amount shown to the customer. |
| Token and network | Required | A supported USDT or USDC option from Supported Assets and Networks. |
| Metadata | Recommended | Product name, description, quantity, order ID, invoice ID, booking ID, or customer reference. |
| Return URL | Recommended | Where hosted checkout sends the customer when they select Back. |
| Payment window | Optional | How long the checkout remains usable. If omitted, the default payment window applies. |
Only supported token and network combinations enabled for the merchant account should be offered to customers.
Merchant order or invoice references help match payment status, settlement, invoice, receipt, refund, and support records later.
Fixed After Creation
After checkout session creation, its payment terms are fixed for that order. Later merchant setting changes apply only to future checkout sessions.
Checkout Surfaces
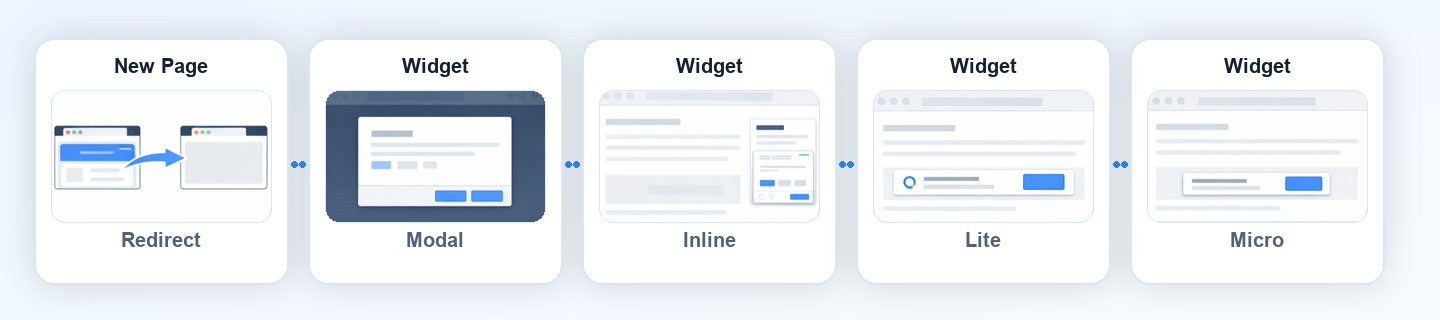
After creating a checkout session, choose how customers open it. The diagram below shows the Stafiel-rendered checkout surfaces.
Hosted Checkout (Redirect)
Hosted checkout opens a Stafiel-hosted payment page as a separate browser page or tab. It is best for a complete payment page without building the payment screen inside the merchant site.
Customers see the session amount, token, network, payment status, QR code, payment address, payment window, and checkout metadata such as product title, description, and quantity.
- Redirect: opens the hosted checkout page in a separate browser page or tab.
Customers can switch the hosted checkout language or light/dark theme without leaving the payment page. The selected language remains active for the current page session, including when the checkout reaches its expired view.
The payment-window progress bar fills as time is used. Its filled portion shows elapsed time, while the remaining track shows the time still available. The bar changes to warning colors as the checkout approaches expiration.
When the checkout session contains an allowed metadata.returnToUrl, the
hosted checkout Back button returns the customer to that URL. Without an
allowed Return URL, the button is disabled.
For URL format and policy rules, see Checkout Sessions API.
Widget (Modal/Inline/Lite/Micro)
Widget places Stafiel checkout inside the merchant site. It is best when customers should open checkout from the merchant page or keep checkout embedded inside that page. Widget modes use the same session amount, token, network, and payment window.
Widget has four customer-facing modes:
- Modal: opens checkout in an overlay above the page.
- Inline: shows checkout in a larger embedded area inside the page layout.
- Lite: shows checkout in a compact embedded area.
- Micro: shows checkout in the smallest embedded area.
Set language or data-language to en (English, default), zh-CN
(Simplified Chinese), or zh-TW (Traditional Chinese).
Use either Checkout Snippet or Embedded Widget with any of these four modes. For setup and language-update instructions, see Widget Integration.
Custom Payment Page
A custom payment page is a merchant-rendered checkout interface. The merchant backend reads Stafiel payment session data, and the merchant frontend renders the customer-facing payment page. This model provides full control over the interface and is separate from Stafiel-hosted checkout and Widget surfaces. For implementation details, see Custom Payment Page.
How To Choose A Surface
Choose based on where checkout should appear and how much control is needed:
| Need | Recommended surface | Why |
|---|---|---|
| Separate browser page or tab | Hosted checkout | Use a complete Stafiel-hosted payment page. |
| Fast setup inside the merchant site | Checkout snippet | Attach checkout to a button, link, or simple page element with fewer setup choices. |
| More control over Stafiel-rendered checkout inside the merchant site | Embedded widget | Use more layout and behavior options for inline areas, compact blocks, or storefront layouts. |
| Full control over the payment interface | Custom payment page | Render the payment interface from Stafiel payment session data. |
Checkout snippet and Embedded widget are two ways to add Widget checkout to a merchant site. Both can use Modal, Inline, Lite, or Micro mode with a similar checkout appearance and the same core checkout information; the difference is setup simplicity and page control, while the mode should fit the available page space and checkout flow.
Next Steps
For how customers complete a payment, see Payment Flow. To create sessions from the backend, see Checkout Sessions API.